This piece, "Echoes of Eternity: The Unibeast Chronicles 5.2.0," explores the intersection of technology and nature through the lens of a mythical creature. It invites readers to ponder the possibilities of a future where such a blend is not only imaginable but achievable, serving as a beacon of hope and inspiration.
The Unibeast 520 New builds on its legacy as a go-to bootable USB creator for macOS on non-Apple hardware. Version 520 introduces refined driver injection, improved UEFI support, and broader compatibility with modern chipsets (Z790, B760, X670E) and GPUs (AMD RDNA 3, Intel Arc limited).
For those building a Hackintosh, UniBeast has long been the go‑to USB installer tool. The latest release brings: ✅ Updated bootloader support ✅ Refined driver injection ✅ Broader hardware compatibility (including newer Intel chips and select AMD GPUs) ✅ Streamlined setup for macOS Ventura & Sonoma unibeast 520 new
Creating a piece inspired by the Unibeast 5.2.0, a concept that seems to blend the lines between mythical creatures and futuristic technology. Let's craft a narrative piece that embodies the essence of such a theme.
It is possible that "520" refers either to a specific budget hardware component (like the Intel HD Graphics 520 This piece, "Echoes of Eternity: The Unibeast Chronicles 5
If the Unibeast 520 New is out of your budget or doesn't quite meet your needs, there are a range of alternative laptops that you may want to consider. Some options include:
Follow these steps sequentially to configure your thumb drive and target computer hardware properly. Step 1: Format the USB Drive Insert your 8 GB+ flash drive into your working Mac. Open (found via /Applications/Utilities ). Let's craft a narrative piece that embodies the
Turns an official, Mac App Store-downloaded macOS installer into a bootable USB drive.
If you'd like to get your specific hardware running smoothly, tell me: What are you using? What specific version of macOS are you trying to install?
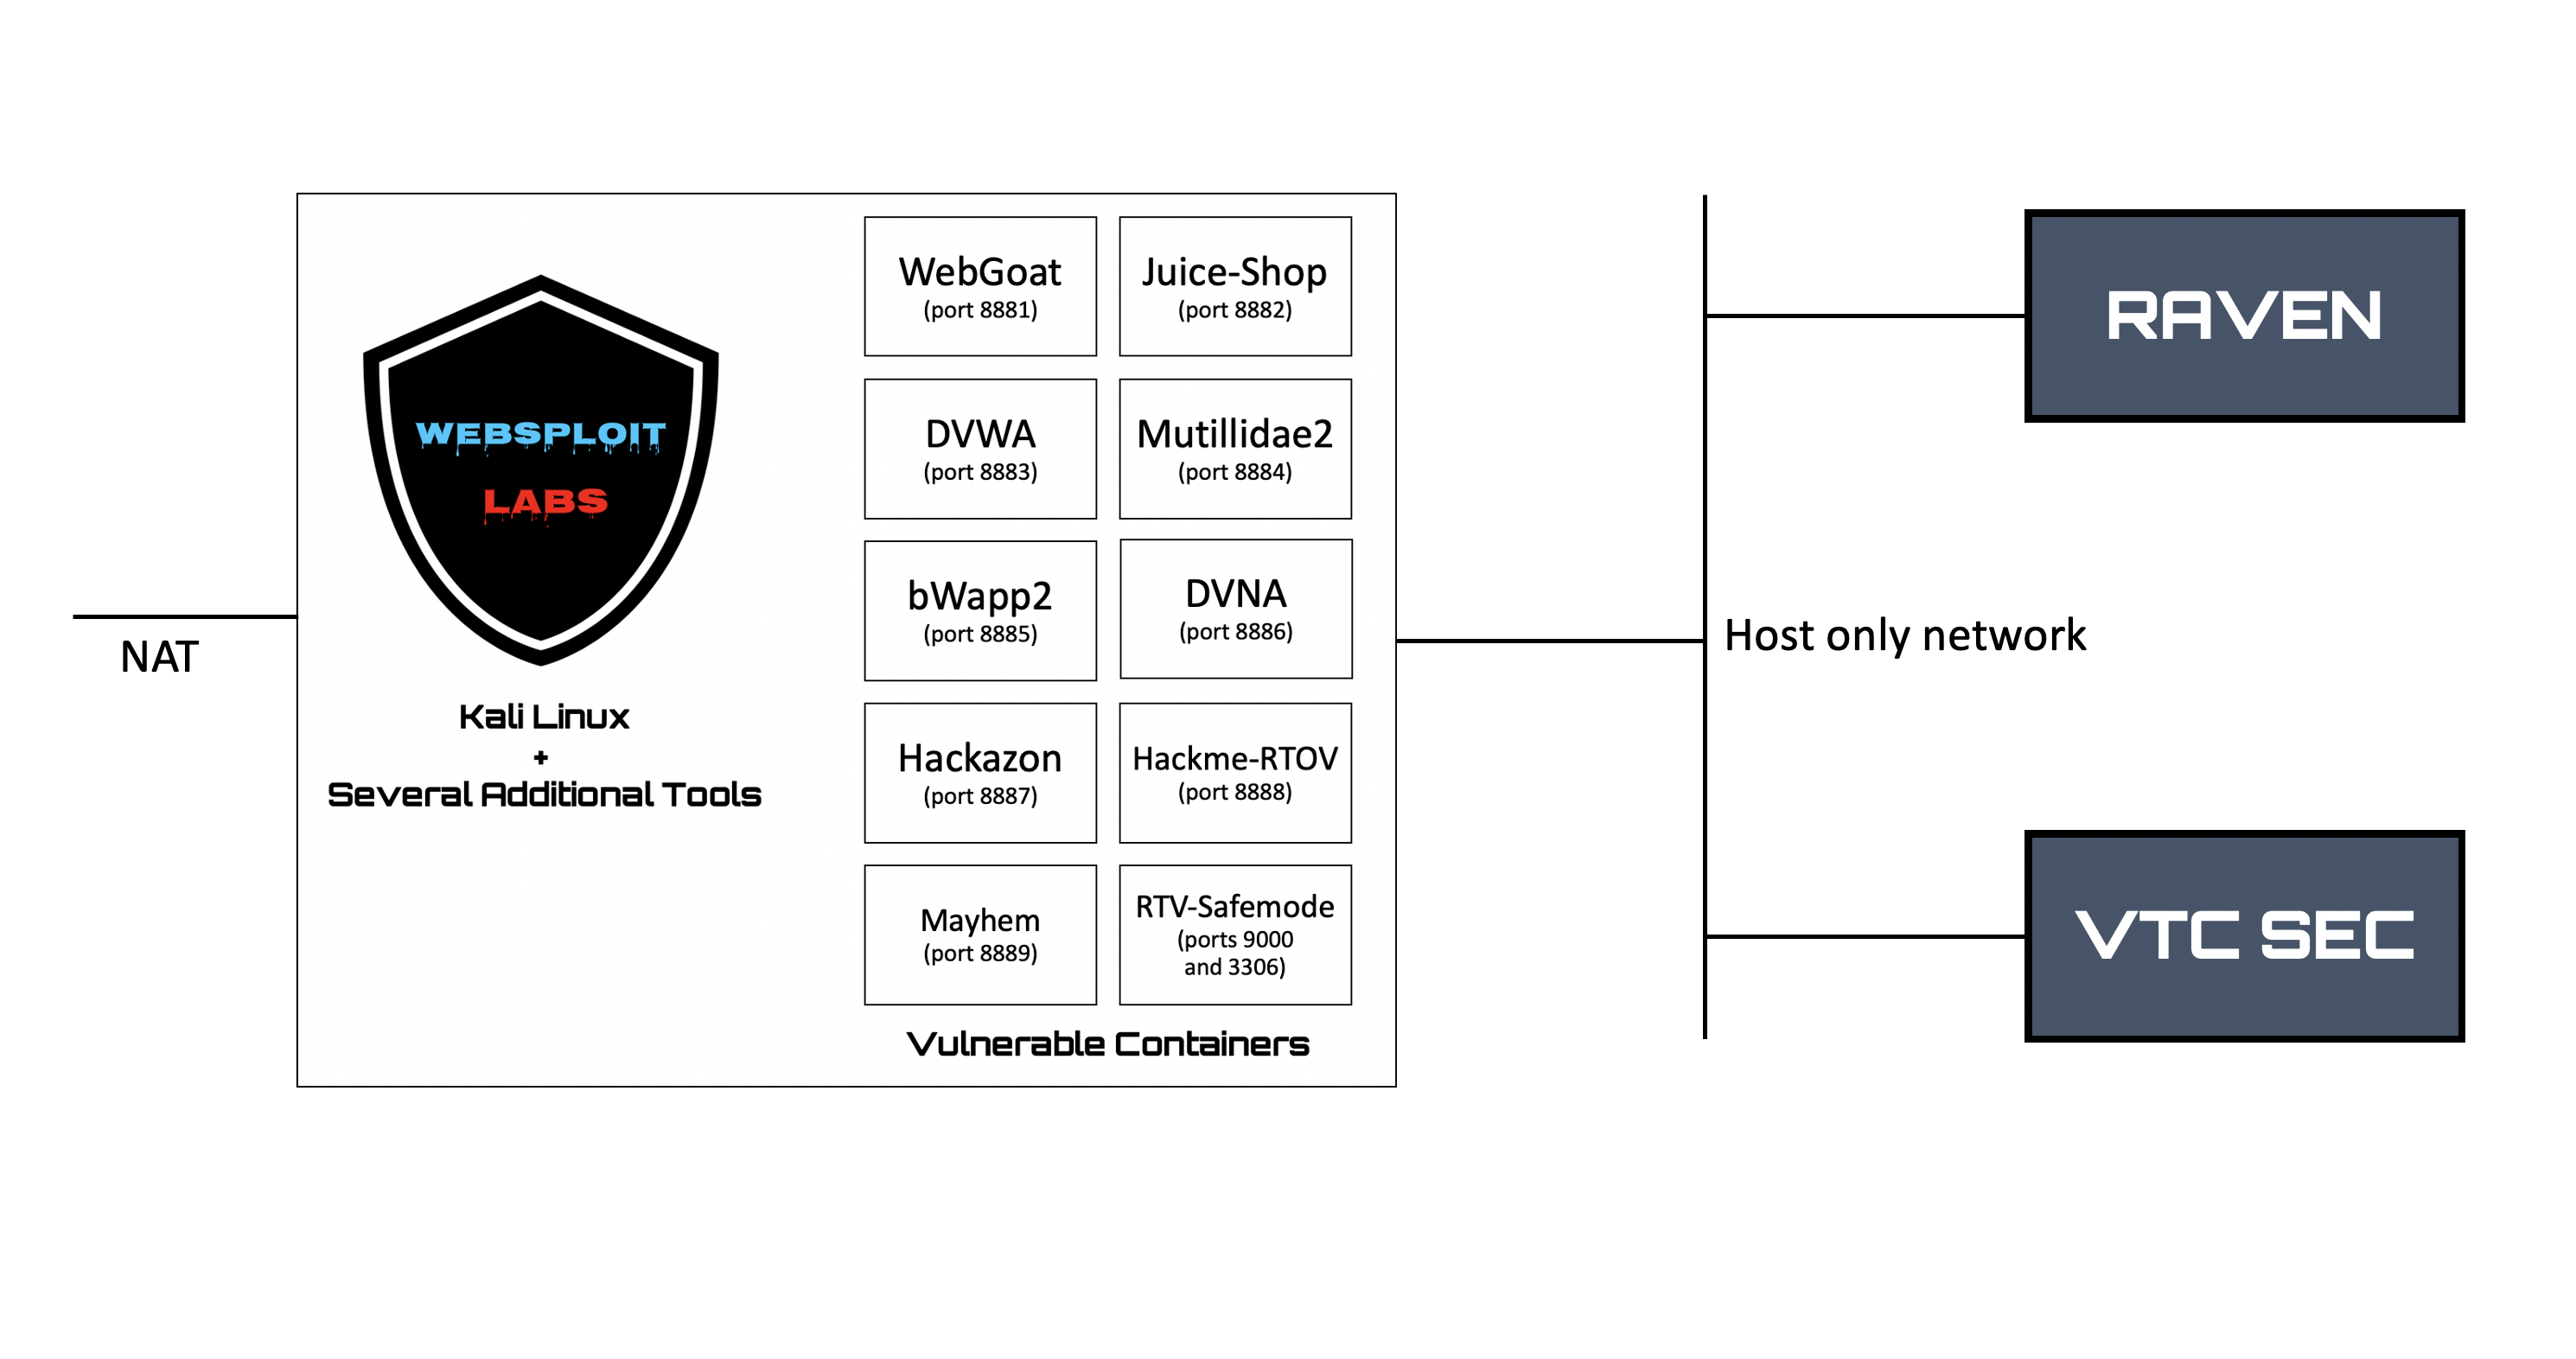
Kali + Additional Tools + Vulnerable Applications in Docker containers...
A vulnerable VM that you will use to perform a full assessment (from reconnassaince to full compromise)
Another vulnerable VM that you will use to perform a full assessment (from reconnassaince to full compromise)
This video explains how to setup the virtual machines in your system using Virtual Box.
The diagram below shows the lab architecture with WebSploit Full version, Raven, and VTCSEC. The VMs were created in Virtual Box. It is highly recommended that you use Virtual Box. However, if you are familiar with different virtualization platforms, you should be able to run the VMs in VMWare Workstation Pro (Windows), VMWare Fusion (Mac), or vSphere Hypervisor (free ESXi server).
You should create a VM-only network to deploy your vulnerable VMs and perform several of the attacks using WebSploit (Kali Linux), as shown in the video above. You can configure a separate network interface in your WebSploit VM to connect to the rest of your network and subsequently the Internet. Preferably, that interface should be in NAT mode.
Stay in Touch with Omar!